Backup TrueNAS to the Cloud with Wasabi (S3 Compatible Storage)
TrueNAS is a NAS software that is super secure and protects your data from malware. A network-attached storage (NAS) software is a file-level computer data storage server connected to a computer network, and it makes the stored data available to heterogeneous clients. Wasabi, on the other hand, is a cloud storage service that is much cheaper than Amazon S3.
If you have data stored in TrueNAS, then you want it or need it to back it up somewhere such as Amazon S3, google drive, and Backblaze, etc., to protect it if some failure arises. In this blog post, we will learn how to backup TrueNAS to the cloud with Wasabi. As you will see, it is pretty easy to directly backup TrueNAS to the cloud. So, without further ado, let’s get started.
There are two basic steps in backing up TrueNAS to the cloud, i.e.,
Configuration
Adding a sync task
let’s start with the configuration step.
Configuration
First, go ahead to the Wasabi console page and click on the Access Keys tab. There, you can see a list of access keys, which you will require to access the Wasabi Buckets.
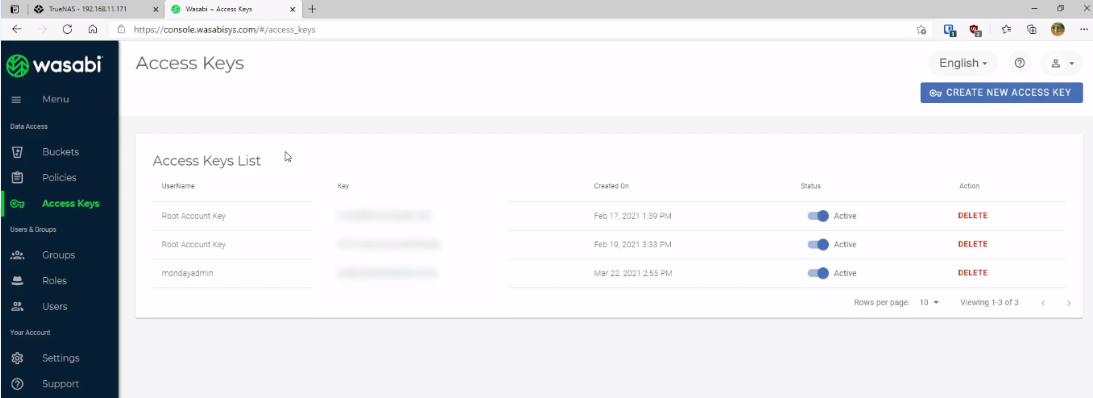
The keys are blurred out here, but you will need yours. Keep their track as we will use them in a bit.
Now, let’s go to TrueNAS and set the cloud credentials that are from Wasabi. To do that, click the System tab in the left navigation and then scroll down and find Cloud Credentials, i.e.,
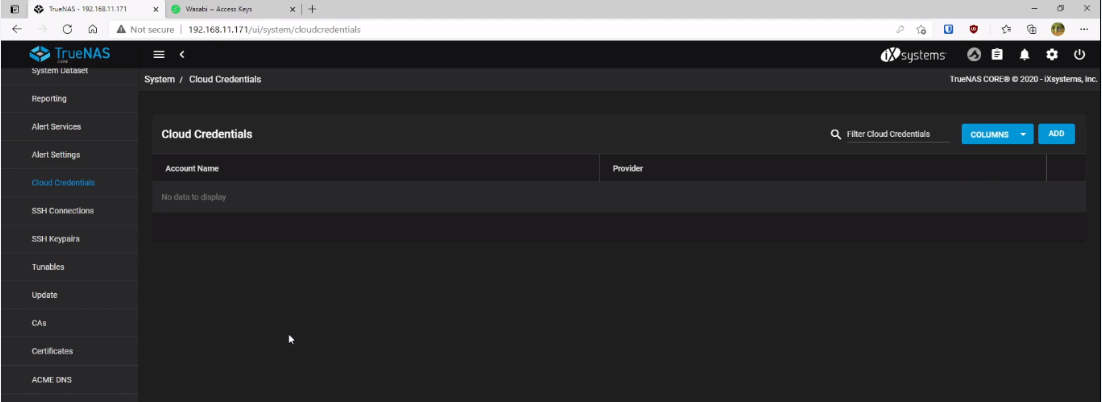
Click on the add button on the right side to insert details.
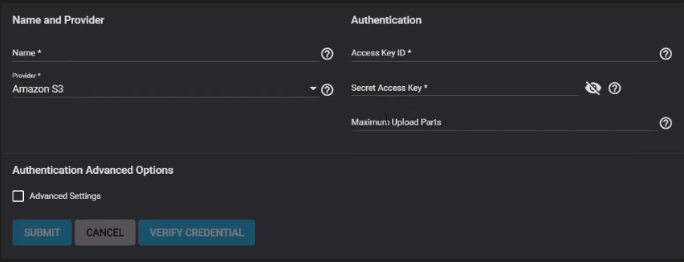
Here, you will add information such as name and provider. You can put any name there. If you click on the Provider field, a drop-down menu will appear, and you can find many different providers such as Amazon S3, Dropbox, HTTP, and Google Drive, etc. One thing you might notice as you scroll down is that there is no option to choose Wasabi. But, don’t worry, since Wasabi is S3 compatible, we can select Amazon S3. After that, we need to add the Access key ID and the Secret Access Key of Wasabi that we had seen earlier. You can add yours there. The Maximum Upload Parts field represents the total number of chunks possible whenever there is a multipart upload. For now, we put 10,000.
Since we are using Wasabi, we need to configure some additional settings as well. To do that, click on the Advanced Settings checkbox.
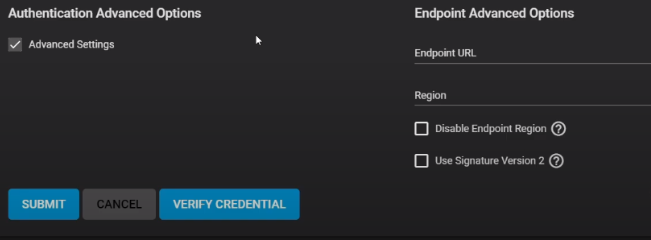
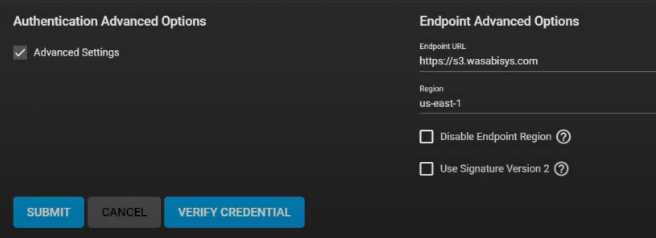
For the Endpoint URL, go ahead to the Wasabi’s Service URLs website and select the URL according to your region. If you do not know or remember what region you added, go to the Wasabi console page and click the Buckets tab. You can see your selected region there.

Since the region selected is us-east-1 (default one) here, the corresponding URL will be s3.wasabisys.com.
These are all the details that you need to add to set the cloud credentials. Finally, click the VERIFY CREDENTIAL button. You should get something like this.
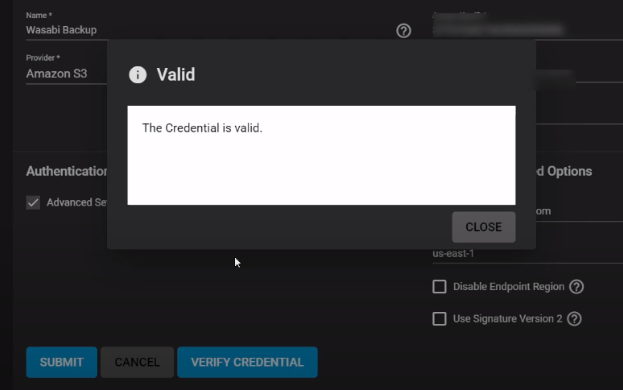
Cool, you are done with the first step!
Add a Cloud Sync Task
This was just the configuration part. The next step is to see how to backup. This will be done by creating a sync task. To do that, go to the Tasks tab in the navigation bar and select the Cloud Sync Tasks option.
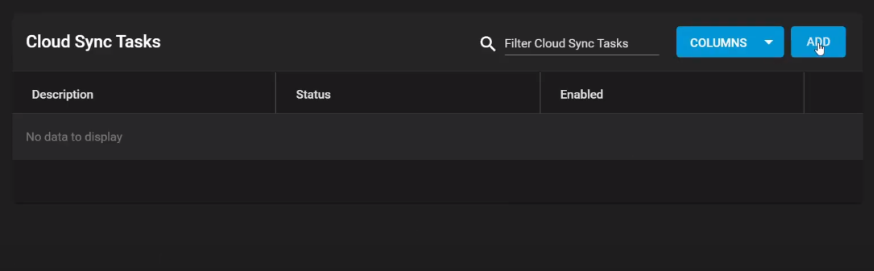
Let’s go ahead and click the add button to create a new task.
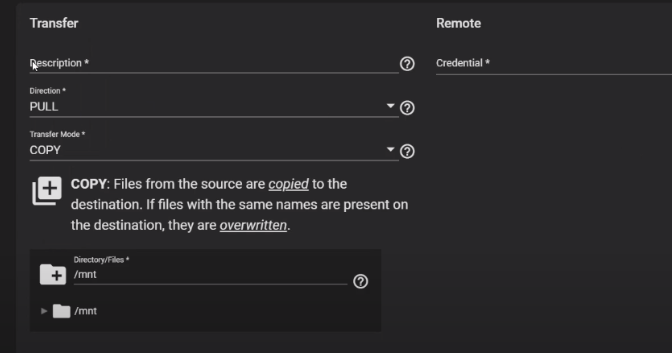
First, add some description about the task and select a cloud credential (the one added in the first step). Then, we need to choose the Direction of transferring the data. It can be either push, i.e., sending to the cloud storage (Wasabi in our case), or pull, i.e., getting the data from the cloud storage. After that, we have to choose the Transfer Mode. There are three of them, i.e.,
Copy: it copies all the files from the source to the destination. If there is a file at the destination with the name as the source file, then it will get overwritten by the source file.
Move: It moves files from the source to the destination. As expected, it deletes files at the source while moving. Like the copy mode, it also overwrites files with the same name at the destination.
Sync: It makes all the files the same between the source and the destination.
For this task, we select the copy mode. Next, we need to specify the Directory that we want to transfer.
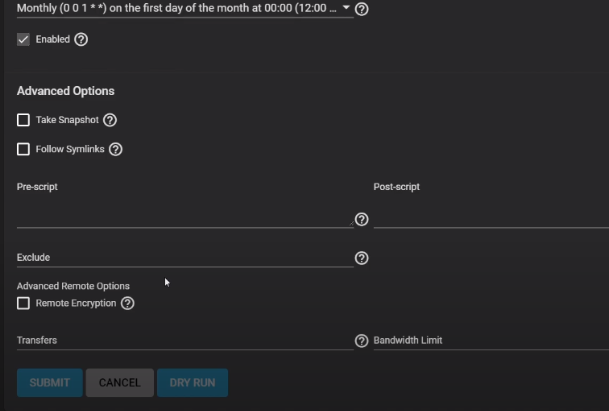
Let’s now specify the schedule to set the timings of task execution. It can be daily, weekly, or monthly. You can also define a custom schedule if you have specific requirements. Here, we choose the monthly backups.
There are also other advanced options available such as bandwidth limit, pre-script, and post-script. You can also encrypt and decrypt your data while pushing or pulling to protect your data from malware. TrueNAS also gives you an option to encrypt or decrypt your file names. So, for example, if you have emojis (or non-standard characters) in your file names. Now, Wasabi doesn’t support such names. Therefore, you can encrypt such file names to properly backup your data. Moreover, one of the great things about TrueNAS is that they have taken the time to explain each field separately. So, you can click on the help icon (the one with ?) to see details about any field if you get confused anywhere.
Now we are all set up to submit our task. But before that, let’s dry run it.
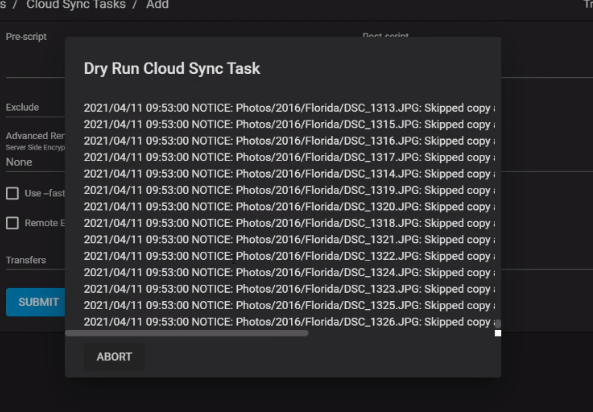
After the dry run gets completed successfully, we submit our task.
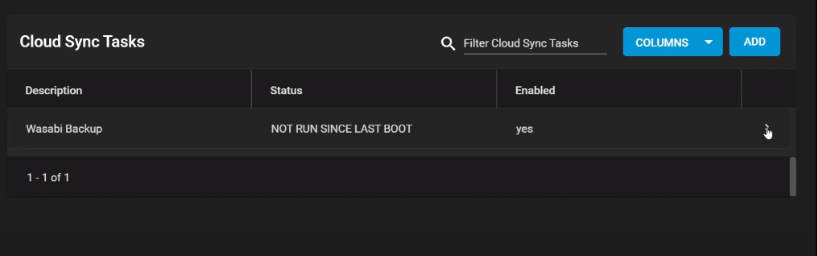
As you can see in the above screenshot, the task is now added. If we click on the details (>) icon, we will get something like this:
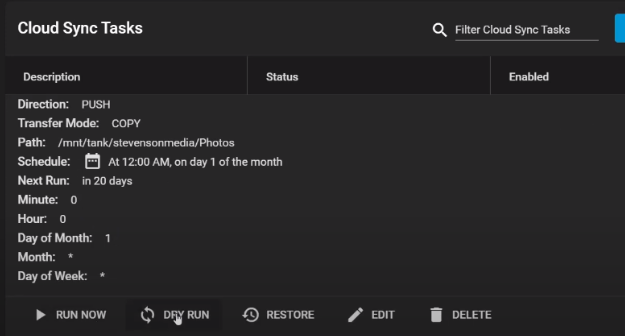
You can see details about the transfer mode, schedule, and direction mode, etc. You can also edit the task, run it now, or delete it, etc. Let’s click on the RUN NOW button.
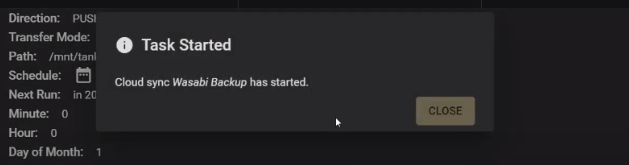

We are done!
Conclusion
That’s all there is to backup TrueNAS to Wasabi. Summarizing the whole post, we started with a brief introduction of TrueNAS and Wasabi. Then, we saw how to set Wasabi credentials in TrueNAS. After that, we added the task to backup the data. One more thing to add here is that if you want to backup multiple separate directories, you will need to create different tasks for them. As you can see, how easy it all is to backup TrueNAS to the cloud with Wasabi.
Full Video
SUPPORT MY WORK
TECH I USE AND RECOMMEND
Tech Kits
Domain Registrar
Digital Ocean CloudServer
- Kevin Stevenson
- Thursday, Apr 22, 2021