Conflicting Virtual Machine ID
If you have conflicting VM IDs while trying to backup to a shared storage this article may be able to help you
- Make sure you have both VMs stopped
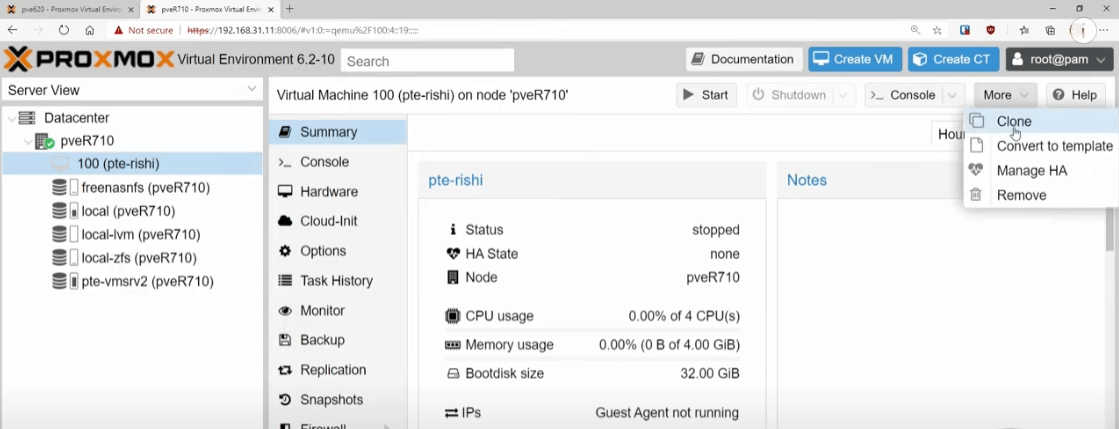
- Click on the VM that you want to change ID’s on then hit more then clone
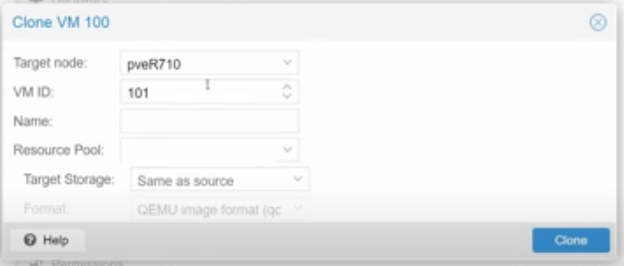
Pick an unused Virtual Machine ID:
- You can keep the name the same
- Select a resource pool if applicable
- Keep target storage as same as source
- Click Clone
It will take a few seconds. You can look at the logs if you want to see the progress. Once it finishes you have successfully cloned the virtual machine.
Boot Newly Cloned Virtual Machine
Now you have two machines. Boot up the newly cloned machine just to make sure it works. Delete the old virtual machine. Click on the old virtual machine and hit more then remove.
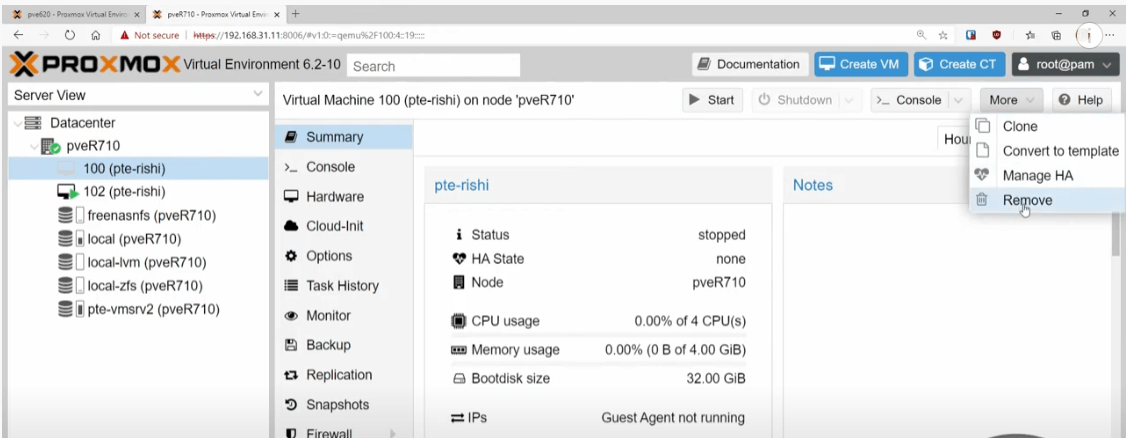
Destroy and Purge the VM
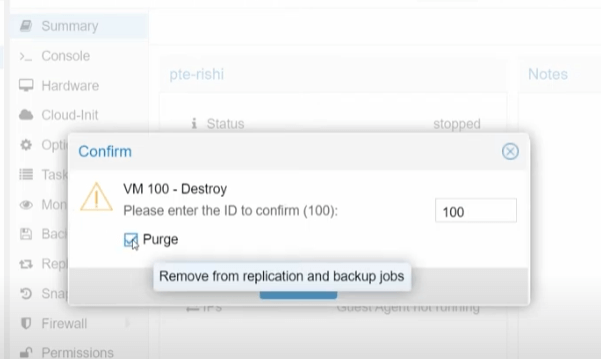
Once you hit remove a screen will come up with some options. The first screen will ask you to enter the VM ID to confirm the selection. Enter the old VM ID.
Select purge to remove old backups and jobs
Backup New VM
You have successfully deleted the old virtual machine. We would highly suggest running a backup right away on the new virtual machine.
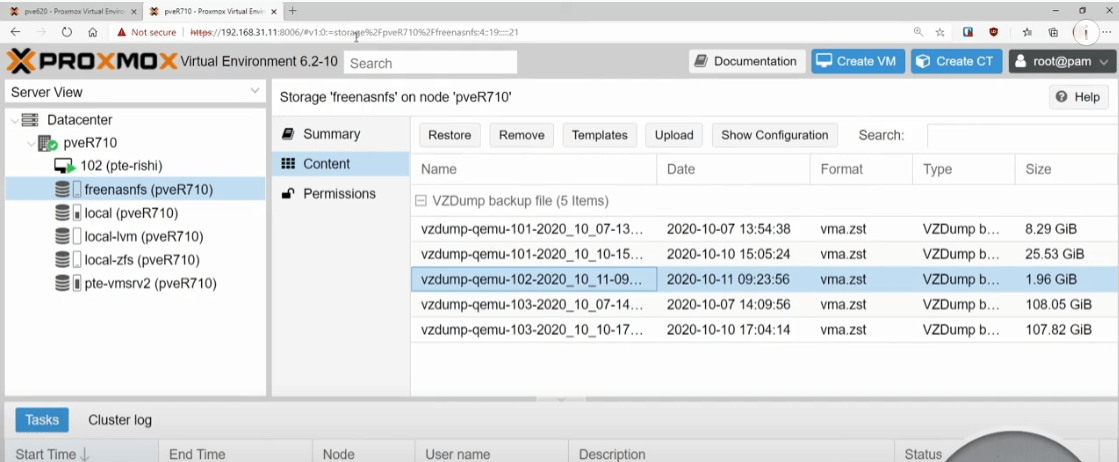
Check the backups and make sure the new VM backed up. Check that it has the new VM ID.
The Step by Step Video
SUPPORT MY WORK
TECH I USE AND RECOMMEND
Tech Kits
Domain Registrar
Digital Ocean CloudServer
- Kevin Stevenson
- Thursday, Oct 15, 2020
